
REFRESH YOUR HOME
Textured-paint removal and wall smoothing
Smooth walls, a new-looking home
Why get rid of textured paint?
Textured paint (gotelé) was the go-to finish here for decades because it hid imperfections and stood up to knocks, but today it ages any home: it eats light, gathers dust, makes cleaning harder and turns hanging or leaning anything into a problem. Smoothing the walls is one of the highest-impact changes there is per square metre: the place looks more modern, bigger and brighter without touching a single wall. That said, not all textured paint is treated the same way. The distemper-based kind softens with water and can be scraped off, while the plastic kind doesn’t absorb and is usually better covered over with levelling compound. Telling them apart is what separates an immaculate finish from a botched one, and it’s the first thing we check on the visit.
Our service
What does our wall smoothing service include?
Smoothing a wall properly takes more steps than you’d think. This is what we do in every home, start to finish.
Identifying the type of textured paint
We run a test on the wall itself to find out whether yours is distemper or plastic based, because the technique and the result depend on it.
Protecting the home
We cover floors, furniture, doors and sockets, and seal off the rooms we're working in so the dust doesn't travel through the house.
Scraping off or covering over
We dampen and scrape distemper-based texture, or cover plastic texture with levelling compound in several cross-directional passes. Never one single technique for everything.
Skimming with filler
We apply filler in thin coats until the surface is completely flat, going back over corners, recesses and the joins with the ceiling.
Sanding and priming
We sand under raking light to catch any imperfection and seal the surface with primer, leaving the wall ready to paint.
Final coat of paint
If you want it all finished, we apply two coats of washable emulsion in the colour you choose and hand the house back clean.
Scrape it off or cover it over?
Both techniques leave the wall smooth, but they don't suit the same cases. The choice depends above all on the type of texture you have, which is why we always check before quoting.
The texture comes off and the base is skimmed flat.
- When it's used On distemper-based texture, which softens with water.
- Dust and mess More wet waste; we protect and clear up daily.
- Final thickness The wall gains no thickness: the original base is kept.
- Result Excellent if the plaster under the texture is sound.
- Risk if done badly Damaging the plaster underneath and multiplying the filling work.
It's levelled over the top with compound and skimmed flat.
- When it's used On plastic texture, which doesn't absorb water or scrape off well.
- Dust and mess The cleanest technique: it barely creates any waste.
- Final thickness Adds a few millimetres; we make good around frames and sockets.
- Result A continuous, very flat finish, ideal for painting.
- Risk if done badly Ripples that show in raking light and visible joins.
Not sure which type you have? On the visit we check it with a test on the wall itself and tell you which technique suits, at no obligation.
Straight talking
Is it worth doing it yourself?
You can, of course: there are plenty of tutorials and you can hire the kit. But it’s worth knowing what you’re signing up for. Stripping a whole flat by hand is weeks of work, dust in every corner and a final sanding stage where the entire result is decided: any ripple or trowel mark shows in raking light the moment you paint. If it’s one small wall and you enjoy DIY, go for it. If we’re talking several rooms with ceilings included, the difference between a home-made finish and a professional one shows every day when you switch the light on (and the real saving, once you count materials, tools and your own time, is usually far smaller than it looks). Our honest advice: get a price before you decide, and compare knowing what’s included.
A quote made for you
How much does textured-paint removal cost?
The price works out per square metre, but no two homes are the same. This is what makes the difference in your quote:
The type of texture
Square metres and ceiling heights
The condition of the walls
With or without the final paint
That’s why we don’t publish fixed rates: every home is different and we’d rather see yours before giving a figure. Write or call us and we’ll arrange a no-obligation visit, with a detailed quote broken down line by line, free of charge.
How we smooth your walls
A good smooth finish is won in the preparation and in the final going-over. This is how we work from start to finish, so you always know what's happening in your home.
Visit and texture test
We check on the wall whether your texture is distemper or plastic based, measure the rooms and look at the condition of the surface. No obligation and no cost.
Detailed quote
You get a quote per square metre, broken down line by line and stating the technique we'll use in each room. No small print and no hidden costs.
The work, with the house protected
We seal off and protect each room, work area by area and clear up at the end of every day so you can carry on living at home.
Raking-light check and handover
We go over every wall under raking light, which is where any imperfection gives itself away, put right whatever needs it and hand the house back clean.
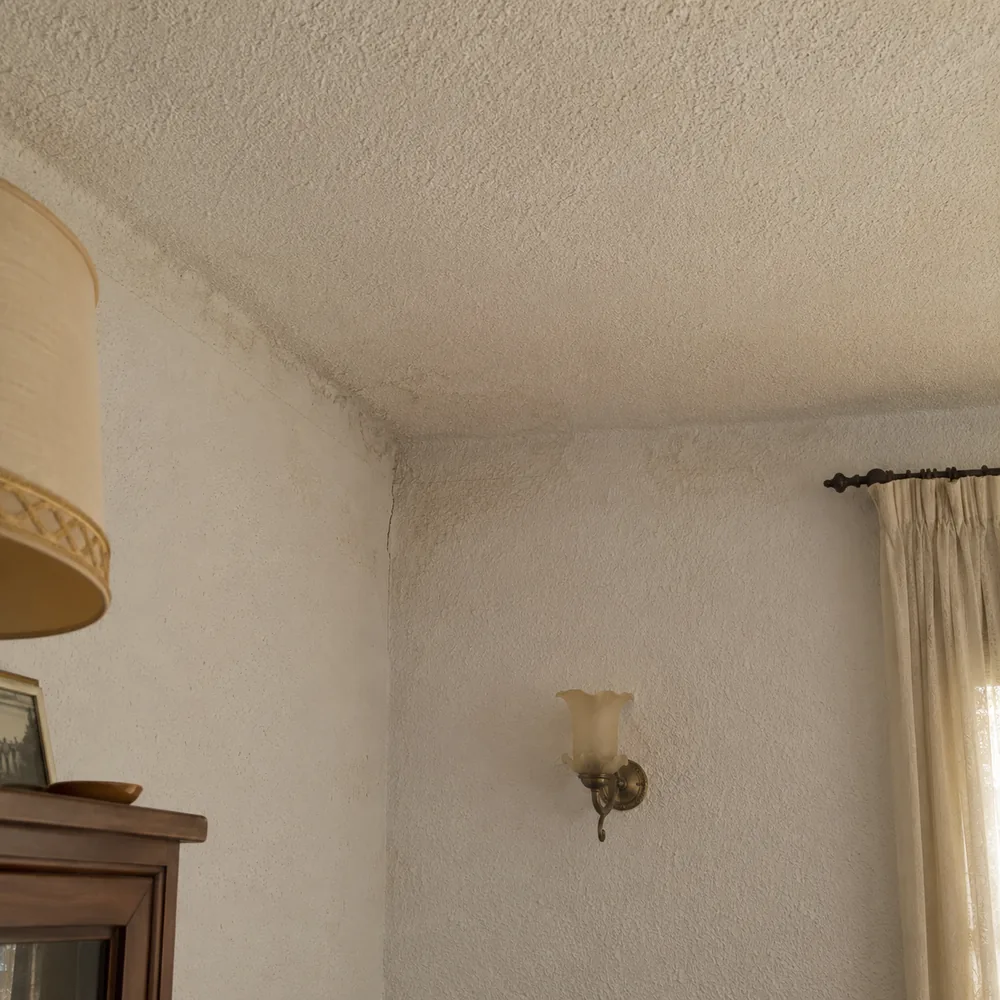
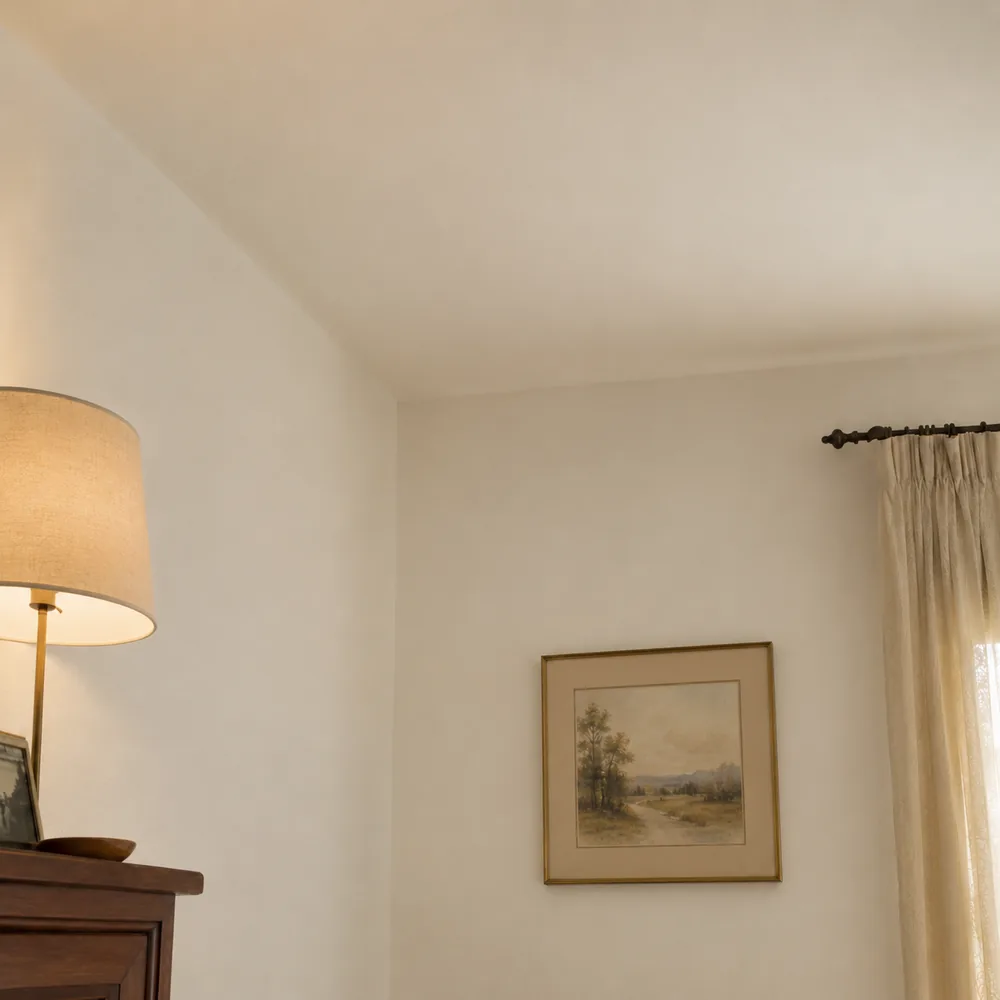
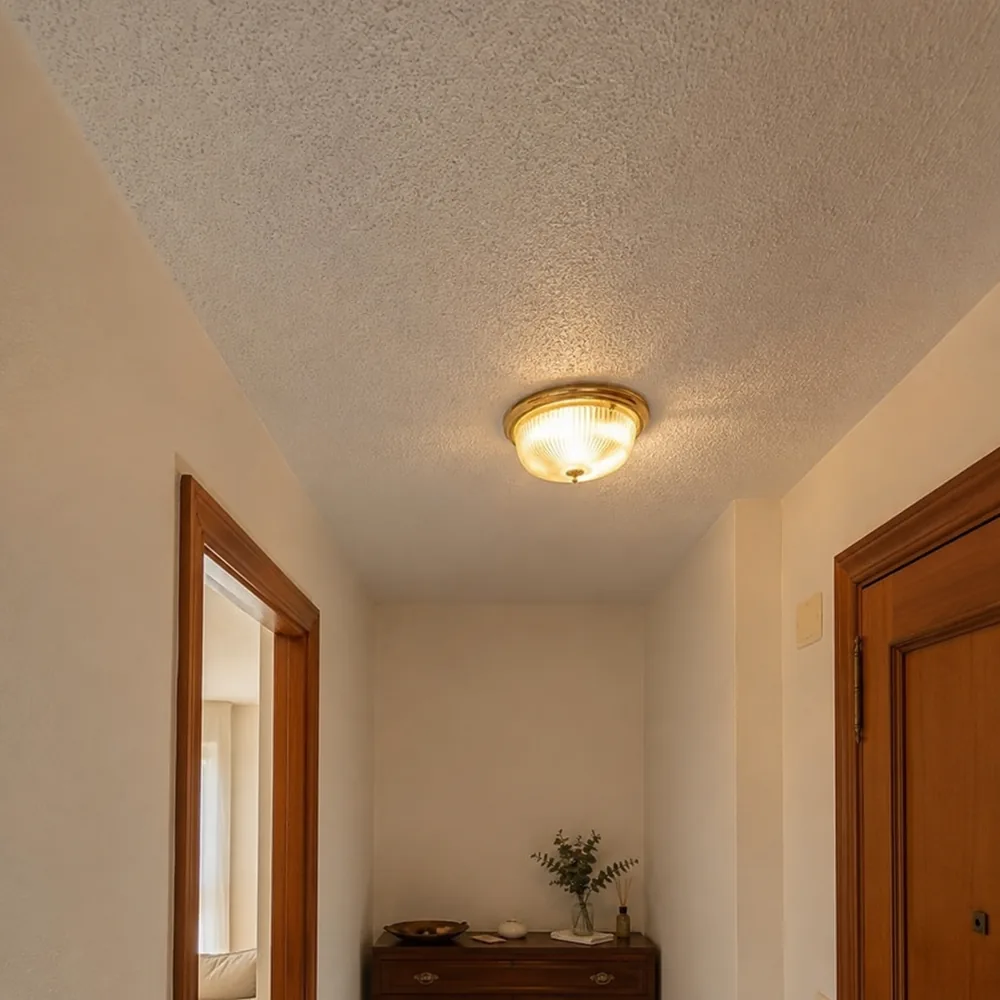
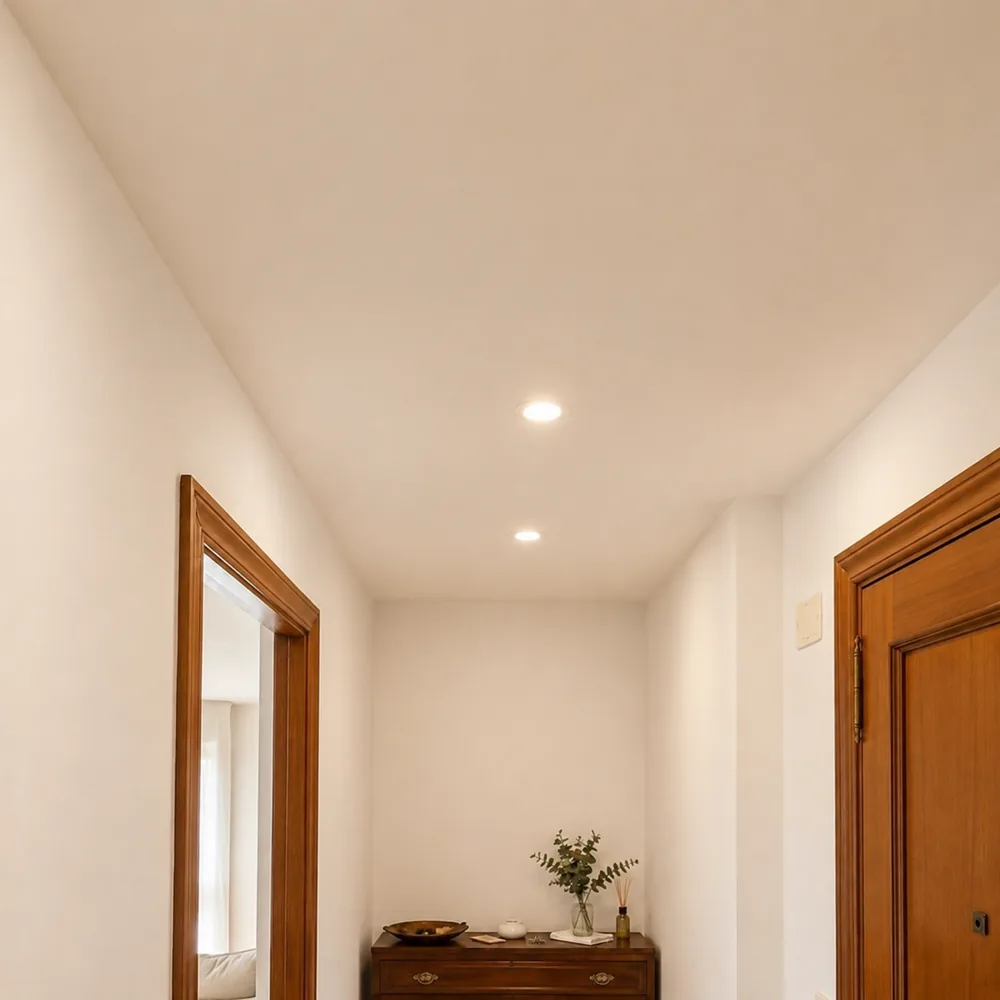
Smoothed walls, before and after
This is what the change looks like on a textured-paint removal job. These examples show the kind of result we achieve; once we have photos of your own projects, we’ll add them here.
Frequently asked questions about removing textured paint
Here are the questions we get asked most before starting. If you still have one, write to us and we’ll help, at no obligation.
It depends on the type. If it’s distemper based, the best approach is to dampen it and scrape it off, because water softens it. If it’s plastic based, it doesn’t absorb and the most effective route is to cover it with levelling compound applied in cross-directional passes. That’s why the first step is always a test on the wall itself: the wrong technique multiplies the work and worsens the finish.
Neither is better as a rule: scraping is ideal for distemper and keeps the wall’s original thickness, while covering is the cleaner option and the usual one with plastic texture. On the visit we check which type you have and recommend the technique that suits your case.
It’s quoted per square metre and depends on the type of texture, the area and ceiling heights, the condition of the walls and whether you want the final paint included. We don’t publish fixed rates because every home is different: we look at yours on a no-obligation visit and give you a detailed, itemised quote, free of charge.
A single room is usually sorted in two or three days, counting skimming, drying times and sanding. A whole flat with ceilings included normally runs between one and two weeks depending on the area and the condition of the walls. The quote gives you a firm timescale with a start and a handover date.
Yes, and it’s actually where the change in light shows most. It’s more awkward and slower than walls, because of the posture and the control the material needs, which is exactly why it’s worth leaving to professionals.
Yes. We work room by room, seal off the areas we’re in and clear up at the end of each day, so the rest of the house stays liveable. All we’ll ask is that you don’t use rooms where material is drying.
You can, particularly on small walls with distemper-based texture. But over large areas the final sanding is critical: any ripple shows in raking light once you paint. If you’re weighing it up, get a price before deciding; counting materials, tools and time, the saving is usually smaller than it looks.
Wet a sponge and hold it against the wall for a couple of minutes: if the texture softens and you can scrape it with a fingernail, it’s distemper; if the water runs off and the texture stays hard, it’s plastic. On the visit we confirm it with a test in an out-of-the-way spot.